
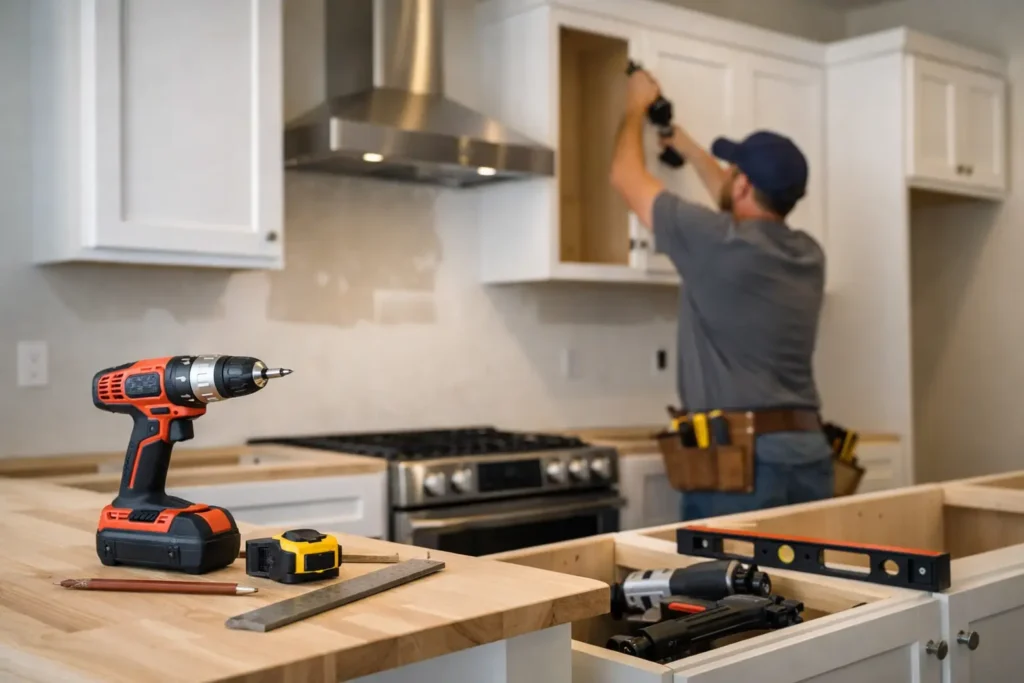
A cabinet project can look simple until the first cabinet meets an uneven wall, a low ceiling, or plumbing that is not where the plan says it should be. This complete guide to cabinet installation explains what needs to happen before, during, and after installation so your kitchen stays on schedule and your finished cabinets look right, work properly, and hold up for years.
Cabinets are not just storage boxes. They set the height of the countertop, determine appliance clearances, affect plumbing access, and define the alignment of the whole kitchen. A small error at the start can create expensive corrections later. Professional installation is about controlling those details from the first measurement to the final adjustment.
Start With a Real Site Check
The cabinet layout may look perfect on paper, but the room decides what is possible. Before any cabinet is installed, measure the walls, ceiling height, window and door openings, floor level, and locations of electrical outlets, water lines, drains, gas lines, and vents. Measure more than once. In older homes especially, walls are often not square and floors are rarely level from one side of the room to the other.
This is the point where an experienced installer identifies issues that can delay the job. A bowed wall may need shimming. A damaged subfloor may need repair before base cabinets go in. Plumbing may need to move to fit a new sink base. If a range hood, dishwasher, microwave, or refrigerator is changing locations, the electrical and venting work should be planned before cabinets block access.
It also pays to inspect every cabinet before installation begins. Check cabinet boxes, doors, drawers, hardware, trim, panels, and fillers against the order. Cabinet installation moves quickly when materials are available and complete. Missing one filler strip or a damaged corner cabinet can stop progress at the worst possible time.
Prepare the Room Before Cabinets Arrive
A clean, stable work area makes installation faster and more accurate. Old cabinets, countertops, backsplash materials, and flooring should be removed as needed. Any hidden water damage, mold, loose drywall, or framing problems should be repaired before new cabinets cover them.
Walls need to be ready for fastening. Cabinet screws must anchor into solid wall studs, not drywall alone. Locate and mark every stud clearly. If the design includes heavy wall cabinets, wide pantry units, or large floating shelves, verify that the framing can support the load. This is not an area for shortcuts.
Flooring timing depends on the project. Some homeowners install finished flooring first for a continuous look. Others install flooring after the base cabinets to reduce material costs. Either approach can work, but it changes cabinet height and appliance fit. The final floor thickness must be included in the cabinet plan, especially around dishwashers, slide-in ranges, and toe kicks.
Complete Guide to Cabinet Installation: The Right Order
Cabinets should be installed in a controlled sequence, not wherever there happens to be open space. The standard process begins with accurate reference lines and moves from fixed components outward.
Establish level lines
Find the highest point of the finished floor. Base cabinets are set from that point so every cabinet and countertop ends up level. Installers mark a level line for the top of the base cabinets, typically 34 1/2 inches from the finished floor before a standard countertop is added.
Wall cabinets require their own level line. Their height depends on the cabinet design, countertop thickness, backsplash plan, and the desired clearance between the countertop and upper cabinets. A common clearance is 18 inches, but specialty countertops, taller backsplashes, and custom designs may require adjustments.
Install upper cabinets first when possible
Most professional installers hang wall cabinets before setting base cabinets. This leaves open floor space for ladders and lifting equipment, and it reduces the chance of damaging the base cabinets or new countertops during the work.
Start with the corner cabinet if the layout has one. Secure it to wall studs with cabinet-grade screws, checking level, plumb, and alignment before tightening fully. Then install the next cabinet, clamp the face frames or cabinet sides together, predrill where required, and fasten the cabinets to each other before securing them to the wall.
Shims are often necessary behind cabinets where walls are uneven. They keep the cabinet face straight without pulling the box out of square. Do not force a cabinet tight against a bad wall. That can twist the cabinet and create door and drawer problems later.
Set and secure base cabinets
Base cabinets usually begin at the highest floor point, often with the corner cabinet or the cabinet beside a fixed appliance location. Adjust each cabinet with shims under the base until the top is level in every direction. Cabinets should be clamped and connected to adjoining units, then secured through the back rail into studs.
Check the run continuously. A cabinet can be level by itself but still sit slightly ahead of or behind the next cabinet. That inconsistency shows up when countertop installers place a long slab or when drawer fronts are aligned. Straight cabinet faces matter as much as level cabinet tops.
Sink base cabinets need special attention. Confirm that water supply lines, shutoff valves, and drain connections fit without cutting away too much of the cabinet structure. If the sink is large or the countertop is heavy, additional support may be needed. Plumbing should remain accessible for future service, not sealed behind a rushed installation.
Do Not Ignore Fillers, Panels, and Appliance Clearances
The details at the ends of cabinet runs are what separate a clean installation from one that feels unfinished. Fillers create the clearance needed for doors and drawers to open near walls. Finished end panels cover exposed cabinet sides. Scribes help close small gaps against uneven walls. Crown molding, light rail, toe-kick material, and trim complete the visual line.
Appliance openings should be checked against the actual appliance specifications, not assumptions. A refrigerator may need air space for ventilation. A dishwasher needs enough width and height to slide out for service. A range needs proper clearance from nearby cabinets and combustible surfaces. If a microwave or hood is installed over the range, its mounting height must follow the manufacturer requirements.
Countertop installation should happen only after the base cabinets are fully secured, level, and verified. This is especially important for stone and quartz countertops. These materials do not flex to hide a cabinet problem. If the cabinet run is not flat and stable, the countertop can crack or fail to sit correctly.
Final Adjustments Protect the Finished Look
Once all cabinet boxes, panels, and trim are installed, the job is not finished. Doors and drawers need adjustment. Modern hinges allow changes in height, side-to-side position, and depth so reveals are even and doors do not rub. Drawer slides should move smoothly and close correctly under normal weight.
Inspect every cabinet for secure fastening, clean seams, proper caulking where needed, and consistent door gaps. Test each drawer, hinge, pullout, and lazy Susan. Confirm that appliances open without hitting handles or nearby walls. Then remove job debris and protect completed surfaces while countertops, plumbing fixtures, backsplash, and final hardware are installed.
A good cabinet installation also considers what comes next. Countertop crews need a stable base. Plumbers need access to valves and drains. Electricians may need to complete under-cabinet lighting. Coordinating those trades through one accountable team prevents the common problem of one contractor blaming another when something does not fit.
When Professional Installation Makes Sense
A homeowner with the right tools and experience can install a small, straightforward cabinet run. But the trade-off is time, lifting, precision, and the risk of damaging expensive materials. Full kitchen installations, heavy upper cabinets, uneven rooms, plumbing changes, custom panels, and stone countertop projects are better handled by trained installers.
Cobo Kitchen Master & Home Repair can supply in-stock cabinets and coordinate installation, countertop work, plumbing, and interior repairs under one team. That means less waiting on separate suppliers and fewer calls to manage once work begins.
The best time to solve an installation issue is before the cabinet is fastened to the wall. Get the room measured correctly, confirm materials are on hand, and make sure the installer has a clear plan for cabinets, countertops, appliances, and plumbing. That preparation is what turns a kitchen project from a drawn-out disruption into finished work you can rely on.