
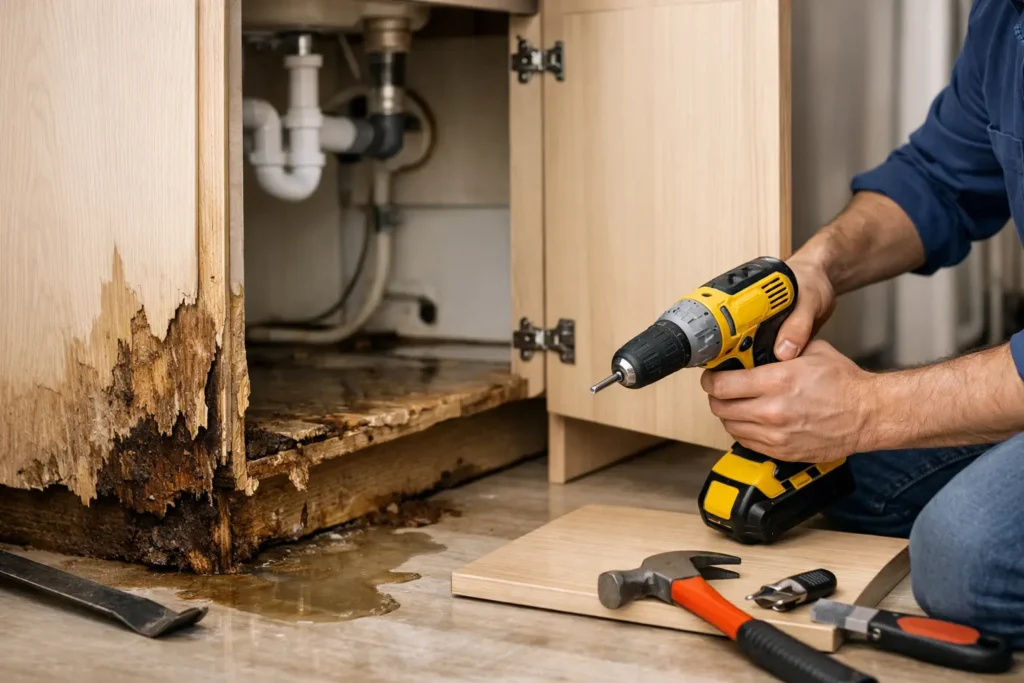
A swollen cabinet base, peeling finish, or soft area beneath the sink is not just a cosmetic problem. Water damaged cabinet repair begins by finding and stopping the source of moisture. If the leak is still active, even a well-done repair will fail – and the damage can spread into flooring, drywall, countertops, and neighboring cabinets.
Kitchen and bathroom cabinets take on more water exposure than most homeowners realize. A slow drain leak, loose supply line, failed sink seal, dishwasher connection, or overflowing toilet can saturate wood products from the inside out. Acting quickly gives you more repair options. Waiting can turn a repairable cabinet into a replacement job.
Start With the Leak, Not the Cabinet
Before anyone sands, paints, or replaces a panel, the water problem must be corrected. Check under the sink, around shutoff valves, at the garbage disposal, behind the dishwasher, and along the countertop seam. In bathrooms, inspect supply lines, drain traps, toilet connections, and the caulk around tubs and showers.
A cabinet may look dry from the outside while moisture remains trapped underneath or behind the back panel. That is why the first step is a professional inspection of the plumbing and surrounding materials. The goal is not to cover the damage. It is to make sure the area is dry, stable, and safe to rebuild.
If a supply line has burst or water is actively leaking, shut off the local water valve if possible. If you cannot isolate the leak, shut off the main water supply and call for emergency plumbing service. Fast action can save cabinets that would otherwise need to be removed.
When Water Damaged Cabinet Repair Can Work
Repair is often possible when damage is limited to a door, drawer front, toe kick, trim piece, shelf, or a small section of cabinet flooring. Solid wood cabinets usually offer the best repair potential because they can be dried, cleaned, sanded, resecured, and refinished when the structure remains sound.
Plywood cabinet boxes may also be repairable if the panels have not separated and the edges are still firm. A contractor can remove damaged sections, reinforce the base, replace localized panels, reset cabinets that have shifted, and finish the repaired area to match the rest of the kitchen or bathroom.
The condition of the cabinet box matters more than surface appearance. A stained interior can sometimes be cleaned and sealed. A cabinet that feels solid, sits level, and has no swollen seams may only need limited work once the plumbing issue is fixed.
Drying is not a shortcut. Cabinets need adequate airflow and time before repairs begin. Sealing wet wood or reinstalling a wet cabinet base can trap moisture, encourage mold growth, and lead to recurring odor or deterioration.
Signs Your Cabinets May Be Repairable
Look for damage that is contained rather than spreading. If doors still close properly, drawer boxes remain square, and the side panels are not bulging, repair may be the practical choice. Minor finish lifting near a sink, a loose toe kick, or a water-stained shelf does not automatically mean the whole cabinet system has failed.
A professional can also determine whether the countertop needs to be removed. In some cases, cabinet repairs can be completed with the countertop in place. In others, especially when the sink base has collapsed or the cabinet run has moved out of level, removing and reinstalling the countertop is the right way to get a durable result.
When Replacement Is the Better Investment
Many modern cabinets are built from particleboard or medium-density fiberboard. These materials are affordable and work well in dry conditions, but they absorb water quickly. Once particleboard swells, flakes, crumbles, or loses its shape, it rarely returns to a reliable condition.
Replacement is usually the better decision when the bottom of the sink cabinet is soft, the sides are swollen, the back panel has separated, or the cabinet no longer holds screws securely. You should also consider replacement when mildew odor remains after drying, multiple cabinet boxes are affected, or the damage has reached the wall, subfloor, or adjoining flooring.
Trying to patch severely swollen engineered wood may cost less at first, but it can create a weak cabinet that fails again under the weight of plumbing, dishes, or a countertop. A sink base supports more than storage. It must securely support the sink, plumbing connections, countertop edge, and regular household use.
For older kitchens, a single replacement cabinet can be difficult to match. That does not always mean a full kitchen renovation is necessary. Depending on the layout, replacing the sink base and adjacent cabinets, then adding compatible doors, panels, or a new countertop can provide a cleaner and more cost-effective result.
What a Proper Cabinet Repair Includes
Quality work is more than replacing a wet board. The repair should address the cause, the structural damage, and the finish so the area performs well after the crew leaves.
A complete water damage repair commonly includes these steps:
- Locate and repair the plumbing leak, failed seal, or appliance connection that caused the damage.
- Remove wet, swollen, or contaminated cabinet materials that cannot be saved.
- Dry and inspect the wall, floor, and surrounding cabinets for hidden moisture or damage.
- Rebuild or replace damaged cabinet components, then level and secure the cabinet run.
- Reconnect plumbing, reinstall the sink or countertop as needed, and test everything before completion.
The exact scope depends on the materials and how long the water sat. A minor leak caught the same day may require a plumbing repair and cabinet base reinforcement. A leak that continued for weeks may require cabinet replacement, subfloor repair, drywall work, and new flooring around the affected area.
Do Not Ignore Mold, Odor, or Soft Flooring
Cabinet water damage often hides a larger issue. A musty smell, dark staining, soft flooring near the sink, loose vinyl, or discoloration on the wall behind the cabinet can signal that water traveled beyond the cabinet box.
Do not rely on bleach, fragrance sprays, or a fresh coat of paint to solve that problem. Surface cleaning has a place, but it cannot restore decayed material or dry moisture trapped behind cabinets. Damaged materials need to be opened, inspected, and repaired correctly before the new cabinet or finish goes in.
This is where working with one capable team matters. Coordinating a plumber, cabinet installer, countertop company, and general repair contractor can delay an urgent job and create gaps in responsibility. Cobo Kitchen Master & Home Repair can handle the plumbing repair, cabinet work, replacement materials, countertop coordination, and interior repairs in one process.
Prevent the Next Cabinet Water Problem
Once the repair is complete, a few simple habits help protect the investment. Check under sink cabinets every month, especially after a plumbing repair or new appliance installation. Keep an eye out for drips at shutoff valves and supply lines, and do not leave wet sponges, cleaning bottles, or soaked mats sitting on the cabinet floor.
Use a waterproof liner under the sink, but remember that a liner is not leak protection. It may contain a small drip long enough for you to notice it, but it can also hide moisture if it is never checked. Replace worn sink caulk promptly and address slow drains before they become cabinet-damaging leaks.
If your cabinets are already swelling, staining, or smelling musty, do not wait for a full cabinet failure. Stop the water, get the area inspected, and choose a repair or replacement plan built to last. The right work now protects the rest of your kitchen and gets your home back to normal without unnecessary delays.